Monday 15 December 2014

Parker 51 Pen Tube Giveaway

[Update: this PIF has ended, and the Parker 51 tube is off to sunny Portugal! Thank you for all the positive feedback, entrants. Merry Christmas everyone!]

I've a PIF (Pay It Forward) giveaway live on the Fountain Pen Network, ending at 8 p.m. ish GMT, Sunday 21st of December. I've made a couple of "daily carry" pen tubes for Parker 51s, as photographed below, and giving one of them (the best made one) away.  For a chance to win, just follow the link above to drop me a PM.


FMT pen tubes. Do you recognise the caps?

Excuse me while I Ctrl-V what I wrote on FPN earlier. Ah, here it is!

"I wanted to make something that would be good protection for a daily carry pen, small enough to toss in a day bag with the rest of your gear, but strong enough to ward off damage. The inside of a day bag at walking pace can be a surprisingly hostile place, with jangling keys, spare change, and a heavy laptop all ready to do their worst."

  • "The outside is a rigid PET plastic preform (approx 3mm thick), which is an excellent hard barrier against crushing, bending, twisting, scratching and cutting forces. Hostile synonyms are no match! Shattering - pah! Smashing - pishaw! Spiflicating - pish tosh!
  • The inside is lined with 3mm thick non-toxic, UV resistant closed cell soft foam (60 on the 00 shore scale), to absorb the stress of impact strikes and abrasion. To protect the 51's delicate celluloid jewels against the concentrated force of end on strikes, the top and bottom get 6mm of foam, lined in 100% silk.
  • The screw cap is a repurposed Diamine ink bottle cap. If you're going to make a pen tube, you may as well do it in style!"

The cap's silk lined interior. I wasted a tremendous amount of silk!

Why bother?

Well...here's the thing. I just don't get leather pen cases - those portable, 1-4 pen slot ones, have a look at Pelahale's excellent YouTube channel to see what I mean. Why are leather fountain pen cases so popular? It beats me hollow. Possibly the same reason impractically hot-in-the-summer, cold-in-the-winter leather jackets are popular; they look great...

But leather offers minimal protection from bashing or crushing, despite also being bulky enough to make me wince when I see a pen clip forced over it. The inside is much rougher than a cloth pen wrap too (I've one of Alc3261's cloth wraps, which gives great soft protection). Who wants to slide their vintage pen with 60+ year old plating & marginal imprints in and out of a strop every day? Not this fellow, I can tell you.

So... what's the point of leather pen cases? They've none of the "hard on the outside, soft on the inside" properties you'd think desirable. Those pen tubes Onoto sell, and to a lesser extent the cardboard tubes Retro51 ship their pens in, strike me as a better proposition. Both are lined with soft foam inside, and while I've never used an Onoto pen tube, the Retro51 shipping tube is surprisingly sturdy, despite its cardboard construction.

Size comparison with a Retro51 packaging tube.


Theirs was the righteous path to follow! I had wanted to make a decent daily carry pen case for a while;
the penny dropped when I realised that (1) those beautiful speckled Diamine ink bottle caps use a thread size universally prevalent in plastic soda and water bottle tops, and (2) those same bottles start out life as small 'parison tubes', lightweight and ultra strong. Huzzah!


The abortive, fully silk lined foam interior.

I don't know if all parison tubes are the same as those I bought; unfortunately, they are not pure cylinders on the inside, with a slight choke and flair. This scuppered my plans to line the interior throughout with silk - at least this time around... Still, the foam itself is very soft and giving.

I realise this is kind of an opinionated post. What do you think? Am I being unfair to leather cases? Talking out of my hat? Making with the funny stuff?

More photos:


Tuesday 4 November 2014

Blu Tack: A Fab Fountain Pen Diagnostic and Servicing Tool

Blutack! A fountain pen Praxis Kit.

The ochre-hued days of Autumn have drawn to a close. This post has sat in the drafts list too long! Blu Tack, eh? Any introduction would probably be redundant. You know the stuff - squishy, tacky, non toxic play-dough for adults.

I've been consistently surprised by its versatility as a fountain pen diagnostic and repair tool, as you'll probably be too aware of if you frequent the same online forums I enthuse about it on. Formerly scattered around individual threads, I've finally pulled together a list of uses below. Blogger is still shamelessly awful at anchor links, so scroll down to see Blu Tack -

As Section Pliers
As A Third Hand
Cleaning Threads
Removing Friction Fit Nibs And Feeds From Chinese Cartridge Pens
Cleaning Polish Residue From Awkward Spots
Revealing leaks
Removing Cap Jewels
As A Diagnostic Temporary Sealant


As Section Pliers 

I can't lay claim to this one, as I'd previously read of Blu Tack's ability to grip and twist off screw down wristwatch case backs (which I can attest to myself, it's quite remarkable).

As section pliers, Blu Tack has several splendid qualities. The standout feature is grip. In the photo below, the Blu Tack easily unscrewed a case back  from a wristwatch despite being applied only to its thin steel circumference. You'd think it would struggle with such a smooth surface, but it adheres excellently without the need for heavy pressure.

Mere mortal steel holds no fear for Blu Tack!

Being a malleable putty, there's also no chance of scratching a pen's finish in use. This characteristic also helps maximise the surface area being torqued, molding to complex contours & curves that don't lend themselves particularly well to gripping. This reduces the clamping force the pen has to be subjected to, always a boon with aging materials.

By way of an example, I had a Sheaffer Targa nib unit that needed taken apart, to reseal the leaking inlay (actually, every Targa I've used needed the inlay resealed, barring a sole NOS unit I bought). It was an absolute pig to open. All Targa nib units are made of rather thin injection molded plastic, have a slopey-swoopy shape, and have a threaded join at the cap retention ring. Either the glue bonding this one together was still fresh, or more than the norm was used, or both. Blu Tack's high torque, low clamping pressure qualities broke the glue bond, not the plastic, and left the finish unmarked. Huzzah!


As A Third Hand

A thick blob of Blu Tack really helps when you need extra hands. For instance, I wanted to roll this Summit's badly bent lever flat, which meant having to first extract the J bar and ring. The Blu Tack held the pen steady while my left hand manually pressed the J bar with a thin screwdriver, and my right drew it from the barrel using long nosed pliers.

J bar extraction, with blutack in attendance...

Removing the ring from a celluloid lever filler can be quite scary, especially when the celluloid is this beautiful. Force is being concentrated in a small area of fragile-ish material that may be getting on in years. As well as holding the pen steady as the ring is being compressed, Blu Tack 's compressibility helps cushion the barrel from stress forces in a way the rigid wooden desk below it cannot.


... then removing the lever's ring.


Cleaning Threads

I like vintage pens. Back in the day, they were very much tools to be used all day every day, so I find it a surprise they can be so colourful and evocative. On first receipt, the celluloid barrel of the Summit below, for example, puts me in mind of a lush forest floor. The crud lodged in the cap-to-barrel threads, however, put me more in mind of 50 years' worth of nose picking, bum scratching soap-dodgers who may have used the pen before me.

Prior to a good wash, a wrap of Blu Tack pressed into the threads, then peeled off, lifts any stubborn manky gunk right out!


Lifting stubborn, decades old debris from cap - to - barrel threads.
To quote Frasier Crane; "Oh dear God!"


Removing Friction Fit Nibs And Feeds From Chinese Cartridge Pens

Chinese cheapies can be fun and very inexpensive. Sometimes you get a nice surprise that punches well above its weight,sometimes... not. Build quality and tolerances can be all over the place. The vast majority of Chinese cheapies are cartridge fillers with friction fit nibs and feeds.

If you happen to find the feed needs work on one, it can be a challenge to remove without marring the nib or breaking the delicate feed fins. The presence of a cartridge nipple makes using a  knock out block a bit tricky. A fat blob of Blu Tack fills the fins and protects them from stress, avoids cartridge nipple damage, and keeps ahold of the nib and feed as the section is pulled away from them (see this FPN thread for an example).


Removing a nib and feed from a Chinese cartridge pen (a Baoer 388).


Cleaning Out Polish Residue From Awkward Spots

The polishes I use now (Greygate and Novus) don't tend to leave much residue, but for any awkward nooks and crannies (such as the breather hole in the barrel photographed below) Blu Tack will reach where you can't!


A twirl in a sheet of Blutack pulls polish residue
from this Hero 616 barrel breather hole.


Pinpointing Hard To See Ink Leaks

Can you see the section split in the photo below? I couldn't - and what with having several fountain pens inked at once, finding the finger-staining culprit was a puzzle. Using Blu Tack came to me in a spur-of-the-moment brainwave. A thin length wrapped around the fluted section, then peeled off, revealed a tell-tale ink stain on the Blu Tack, indicating the area that had split. I first wrote this tip on FPN a while ago.


Blutack finds hairline splits your eyes might otherwise miss!
The section shown was BHR and so had to
be replaced, unfortunately.


Removing Parker 51 Cap Jewels

I use Blu Tack instead of a rubber pad to unscrew Parker 51 celluloid jewels (heat is still necessary to soften the sealant). A rubber pad is pretty good, as it can slip if the sealant holding the jewel is still too strong, sparing the jewel from breakage. A thin strip (direct out of packet thickness) of Blu Tack goes one better - it can shear, which enables it to act as a rudimentary torque wrench.

Pressing a Parker 51 cap into a sheet of Blu Tack to unscrew the jewel.


As A Diagnostic Temporary Sealant

Blu Tack is an excellent temporary barrel seal. It can be applied quickly, leaves nothing to clean off internal threads (as it is not applied to them), seals well, and is easily removed.

I'd previously only applied Blu Tack in this way to test self-filler projects so obscure, I never figured anyone else would find the idea useful! When the question came up on FPN, I realised that had I given it some thought, there are plenty of situations where it would be helpful to have a temporary seal; to test aspects of a fountain pen's functionality before permanently sealing, rule out failed rubber gaskets, and so on.

Anyhoo, you simply wrap Blu Tack round the join as shown in the photo below, or this YouTube clip :

Using Blu Tack to test a Hero 616 vacumatic mod,
prior to permanently sealing with shellac.


I think that's the lot! I can only think of one caveat - wash after use (I tend to clean fountain pen parts after disassembly anyway). Blu Tack can stain wallpaper if left for years, so while any risk is probably non existent, being certain takes very little effort.

Can you think of any more uses? If you've some more of your own you're inclined to share, do leave a comment!

Thursday 18 September 2014

Jinhao 321 Fountain Pen Giveaway

[This PIF has now closed, and the Jinhao has found a new home]

I'm giving away this Jinhao 321 on the Fountain Pen Network's Pay it Forward thread! If you like slim, light pens, or are looking for an introduction to hooded nib pens, drop me a PM on the forum within a week or so.


This is the whilom Jinhao 321, not the usurper now going by that moniker. The original is quite a good performer; for more information, here's my review on FPN, and RichardandTracy's, which is full of useful details.


If you mean to throw your hat in the ring, bonne chance!

Saturday 14 June 2014

Retro51 Tornado Bocote Rollerball Pen Review

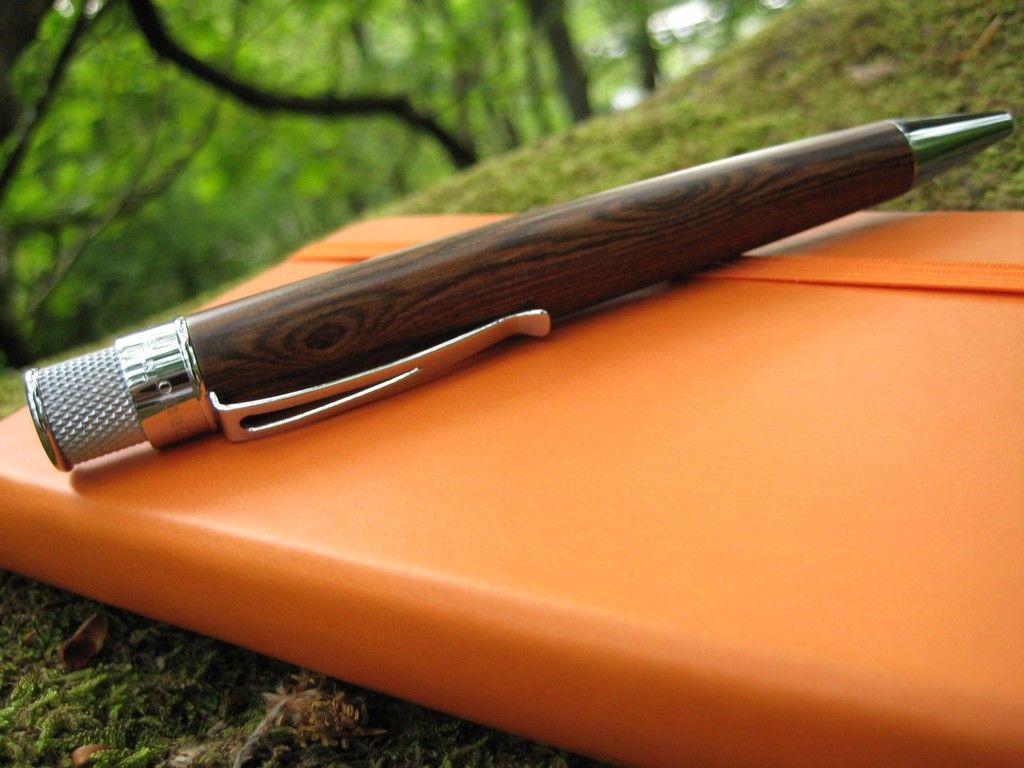
The Retro 51 Tornado rollerball pen, in Bocote wood,
in Pheasants Wood, Mugdock.

Blimey gov'nor, a rollerball review. I don't know much about rollerballs so was a bit unsure of what was out there, though I did have a fair idea of the qualities I was looking for in one:

  • A writing experience as close to a fountain pen's as humanly possible.
  • A non-metal barrel. I just dislike the cold, slippery touch of a metal writing instrument.
  • A high quality look & feel, with a bit of elan thrown in.

With that in mind, I've picked up a Retro51 Tornado, in Bocote hardwood. The Bocote was part of their 'deluxe' range till recently. Although now discontinued, it can still be sourced quite readily online. So! Onward to the review.


Looks
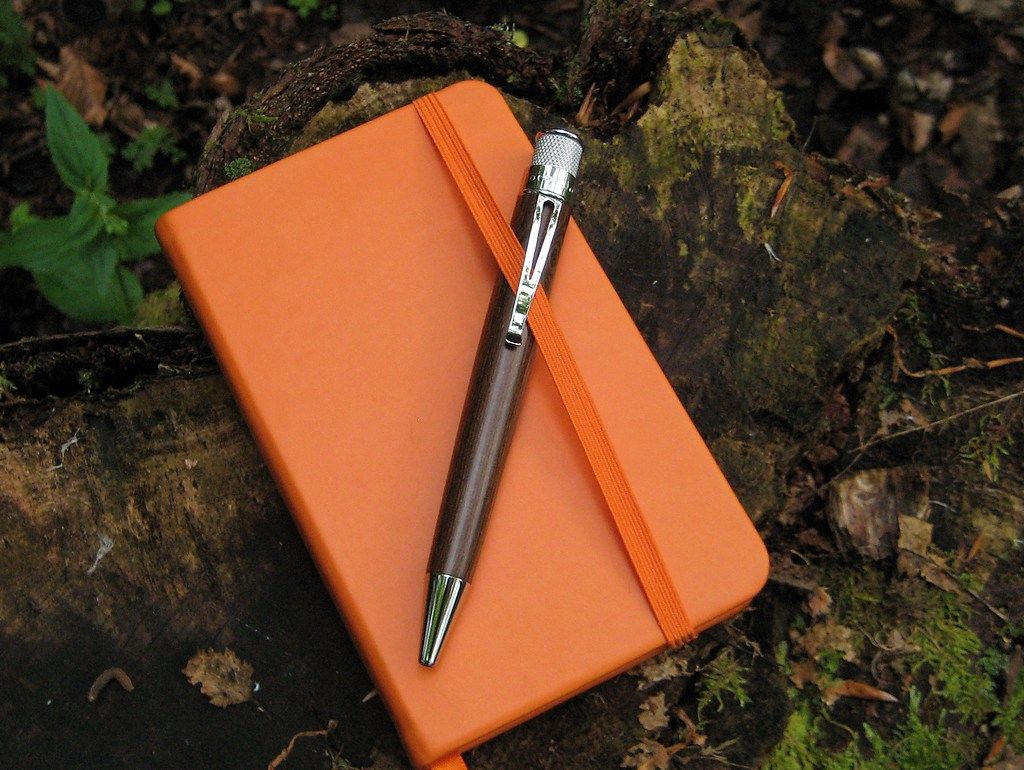
I was lucky in that I got exactly what I wanted, a dark Bocote with plenty of interesting lines and eyes. It's a great finish that contrasts with the bright metalwork in a pleasing way. Being made of wood, there's a lot of natural variability between examples (more on that below); I've seen photos of other Bocote Tornados that were were plainer and much lighter. With the same bright metalwork, they sail a bit too close to kit-pen island for my tastes.

I figured natural light would best represent the colour of the Bocote wood in an accurate way, so charged the camera, laced up the Karrimors, and had a tramp about the great outdoors.

The shiny metal accents are a) very shiny and b) a pain to photograph.

I like the gentle taper to the barrel, and the proportions are fairly pleasing. What do you think? The little cutout window in the clip is a neat touch; the metal knock is defined by a lip at either end. Something that's not obvious in vendor photographs is the style of the end finial; it's a blank metal circle on this model, matching the mirror finish of the clip.


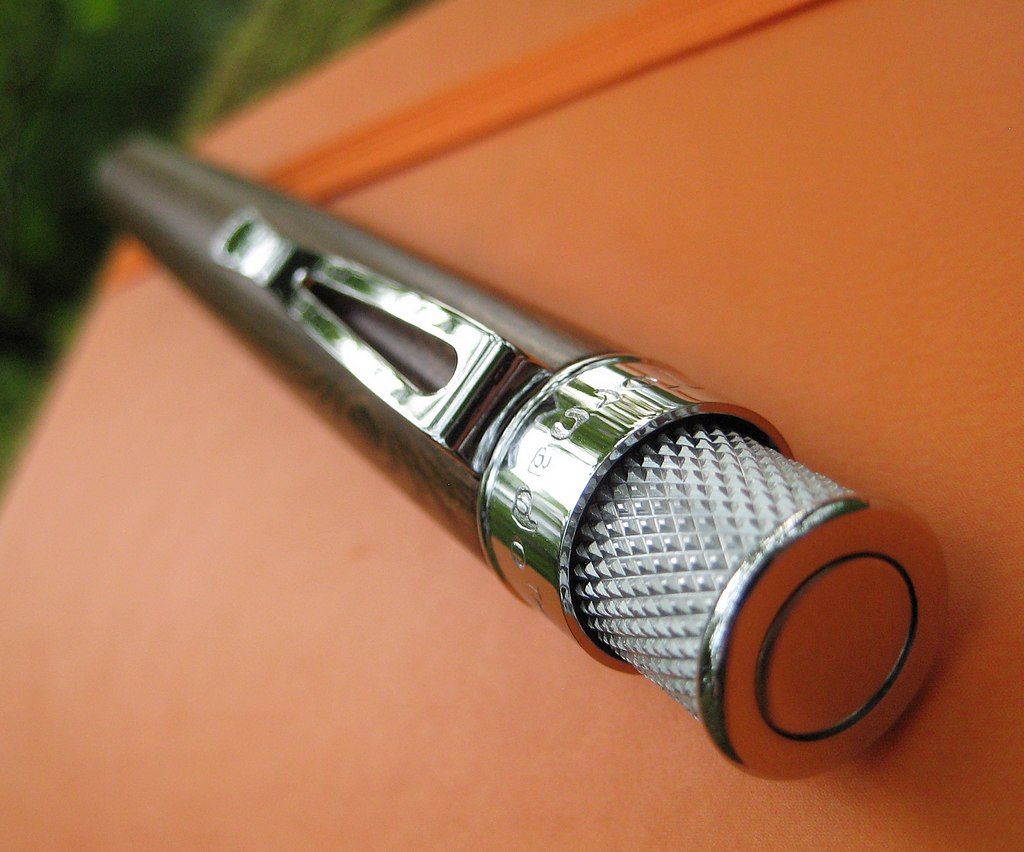
Mirror finish on the clip and knock finial, matte steel on the knurling.

Bocote, of course, is an exotic Central and Southern American hardwood. It has a good natural lustre, and the grain patterning can be quite striking, particularly on flatsawn areas. It’s not uncommon to see many “eyes” and other figuring in Bocote: though unlike knots, they do not seem to present any special challenges in machining.

Did that sound authoritative? It ought to, being plagia-pasted straight from The Wood Database. I have to admit I'd never heard of Bocote wood till noticing this pen for sale. I just saw this finish and found it more interesting and quirky than the "Goncalo" version, which was in production at the same time.


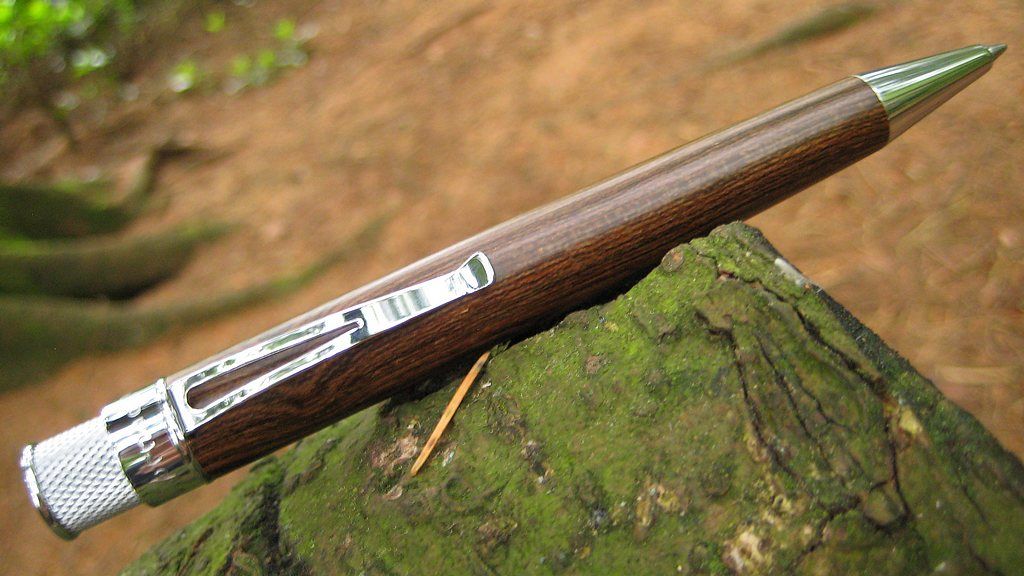
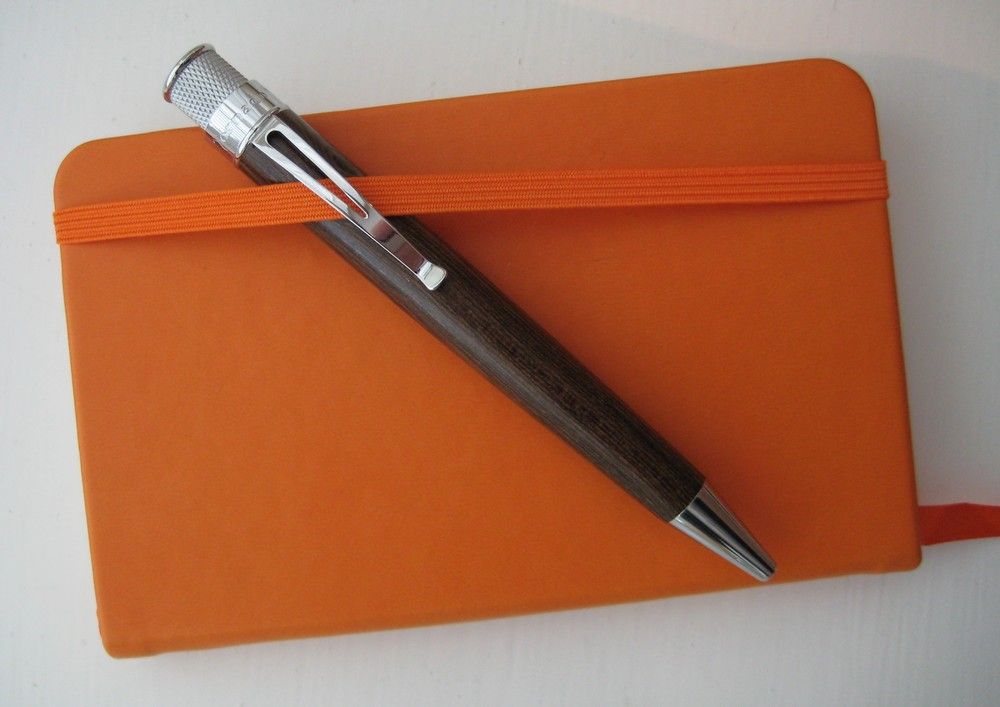
As well as looking good, the Bocote Tornado offers a great tactile experience.
The barrel is warm to the touch, and the ski-jump clip
snag-free & very easy to use.

The promise of an interesting,quirky look was certainly fulfilled. "With its striking, zebra-like contrasts, and bold figuring, Bocote can be a very eye-catching wood". I'd agree with that sentiment (thanks once again, lucidly articulate fellows @ The Wood Database). It's double-plus good, I've really no buyer's remorse in the aesthetics department.


If you stare at this side of the barrel long enough,
it kind of looks like a grumpy Jabba the Hutt is staring back.


Build Quality
Very good, overall, nothing about the Tornado feels flimsy in hand. There's no side-to-side play in the clip, which is attached securely. All external parts fit flush, and the knurling on the twist action knock is deeply cut. On closer examination, a few features really stand out for special comment.

The twist action "knock" turns smoothly, with a little mechanical resistance behind it, like a well weighted steering wheel. It engages with a positive action at the very end of its travel too - it feels as if something within is passing over a cam. Peering up the empty barrel with a torch, at least some of the internal knock parts look to be made of sturdy brass, which is reassuring!


Deeply cut grip knurling on the knock, precision cutouts in the Bocote wood
to accommodate the clip. The finial engraving is a curious design.


A highlight has to be the Bocote hardwood itself. I've read that the hardwood finishes run a little thicker than the standard laquered steel models, but apart from this one minor concession (for my hand, more of a bonus) the material has been seamlessly incorporated into the standard Tornado design. It looks cohesive, not this year's take on an old concept.

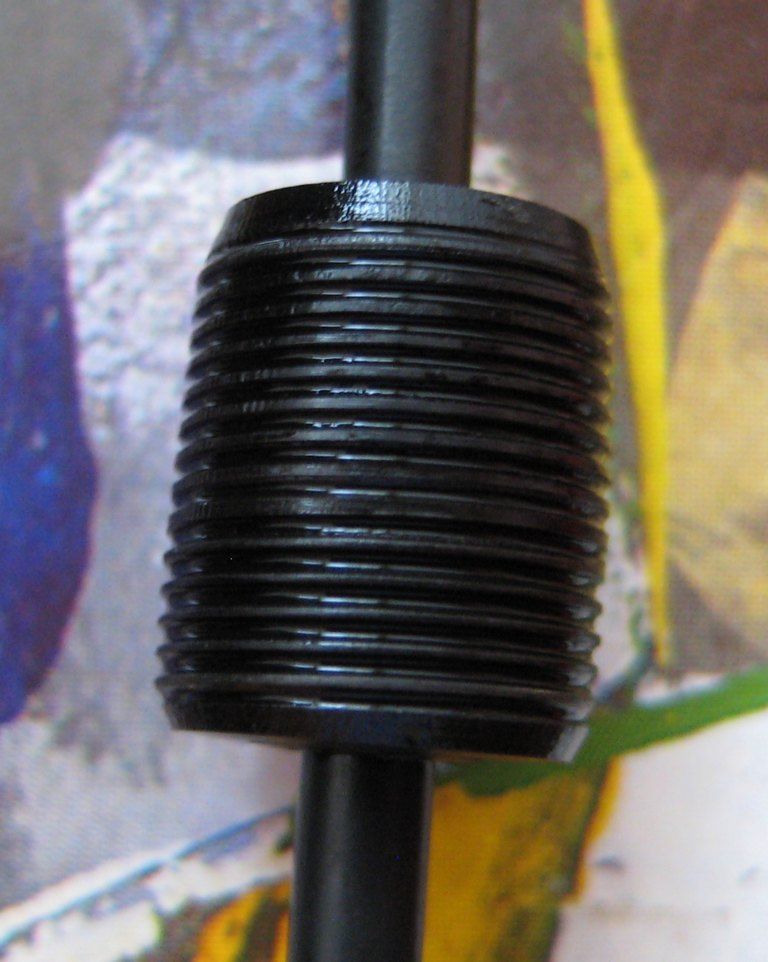
Where I'd expect the use of wood to pose a manufacturing challenge, I've been pleasantly surprised - look at the precision with which the clip slot has been cut in the photo above. Approximately half of the wooden barrel's length appears to be internally sleeved for strength, including the area put under pressure by the open 
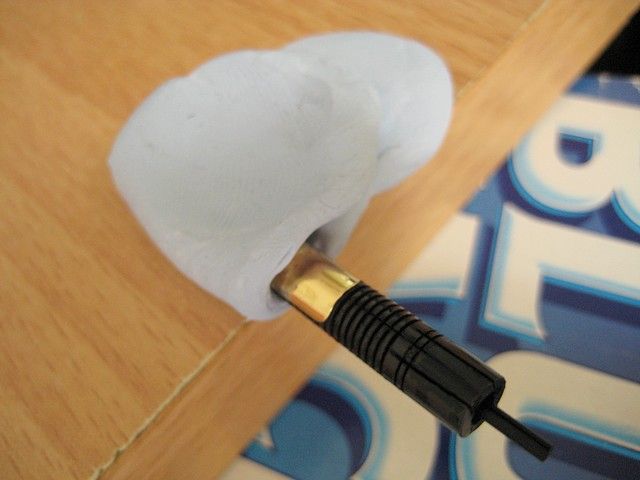
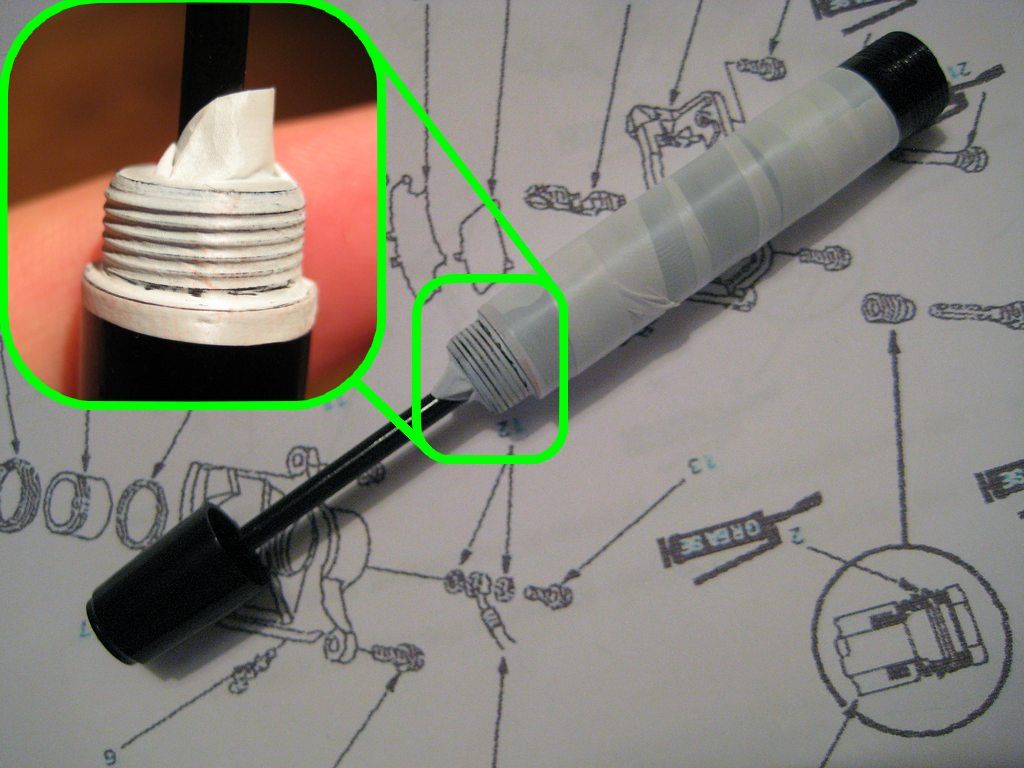
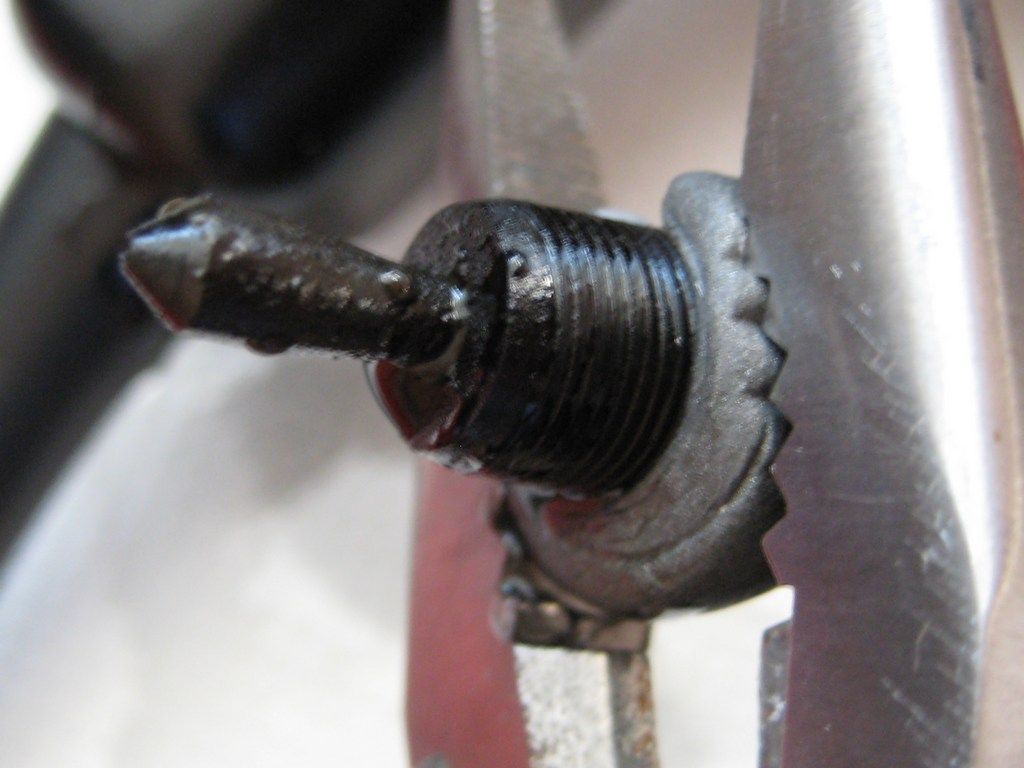
end of the clip. Additionally, the metal nose cone screws into a brass bush, rather than directly into the wood itself.


A brass bush strengthens the end of the hardwood barrel.


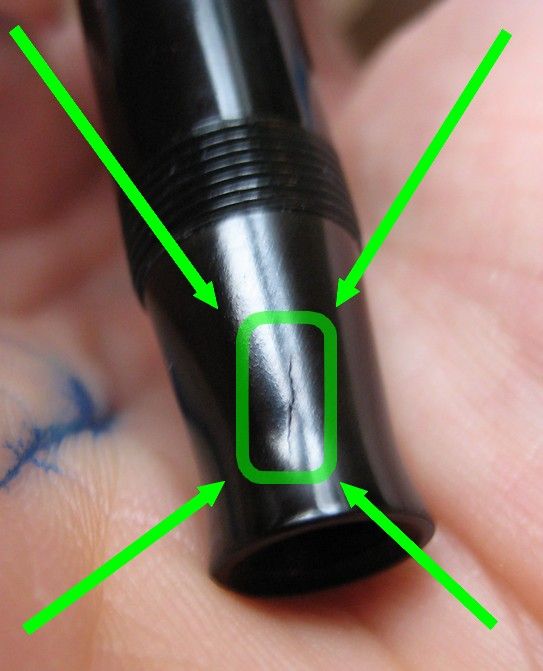
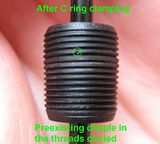
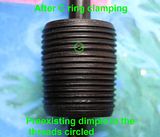
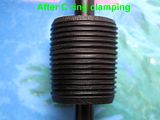
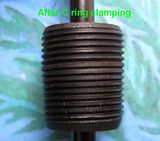
There are a couple of build quality issues. The worst of a mild pair are the minor manufacturing marks on opposite sides of the barrel, perpendicular to the wood grain, and running the length of the barrel.

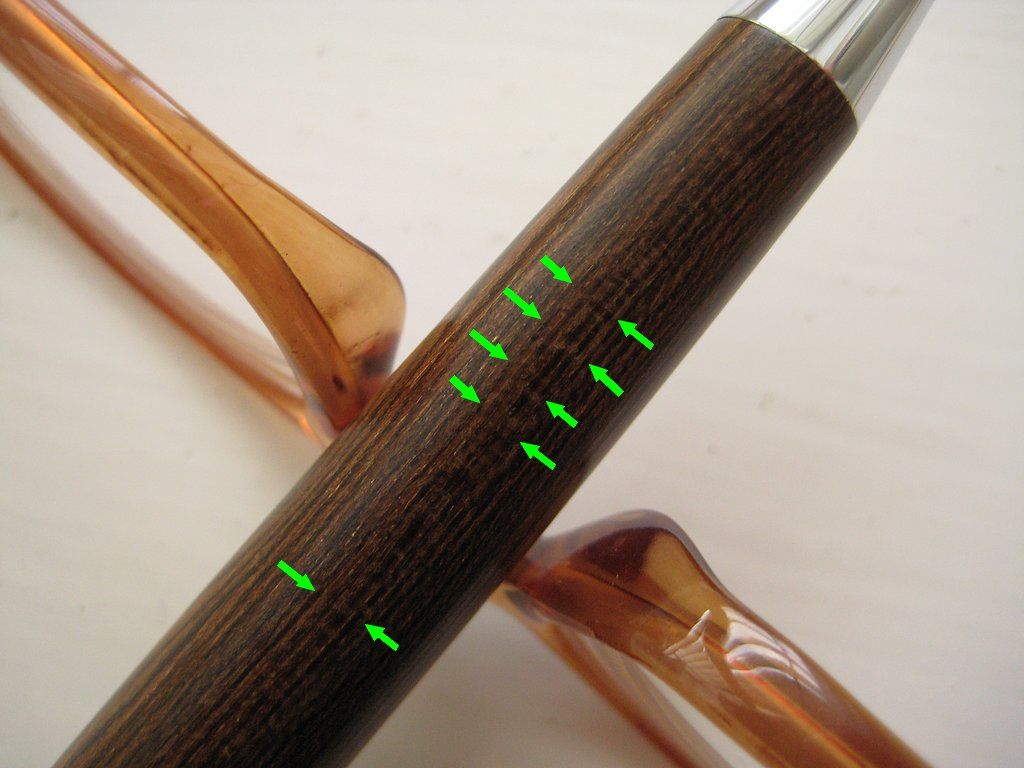
In a perfect world, these manufacturing marks would be polished out.

The marks are too subtle to mar the pen's looks in any meaningful way - you'd have to look hard to find them in most lighting conditions. The photo above was taken in natural light, and shows how indistinct they are. Arrows highlight the most prominent.

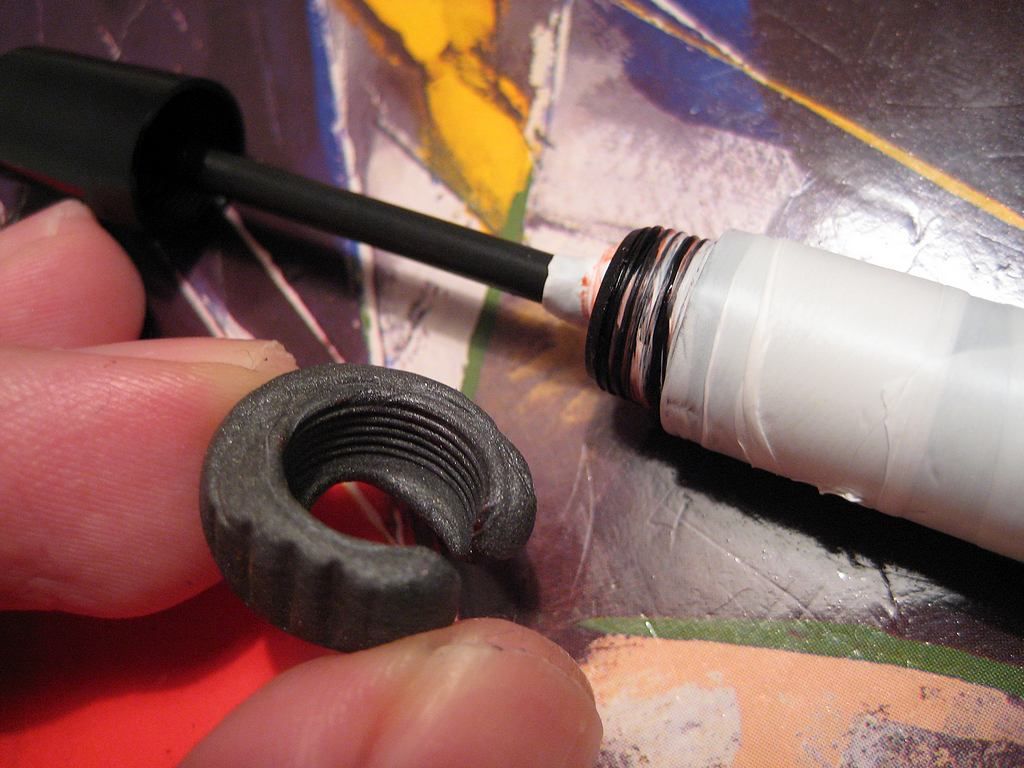
Another minor annoyance is the slight play between the end of the refill and its nosecone, manifesting in an occasional clicky/tappety noise as the point is lifted on & off the page. Typically, this has been apparent only when using a low writing angle.


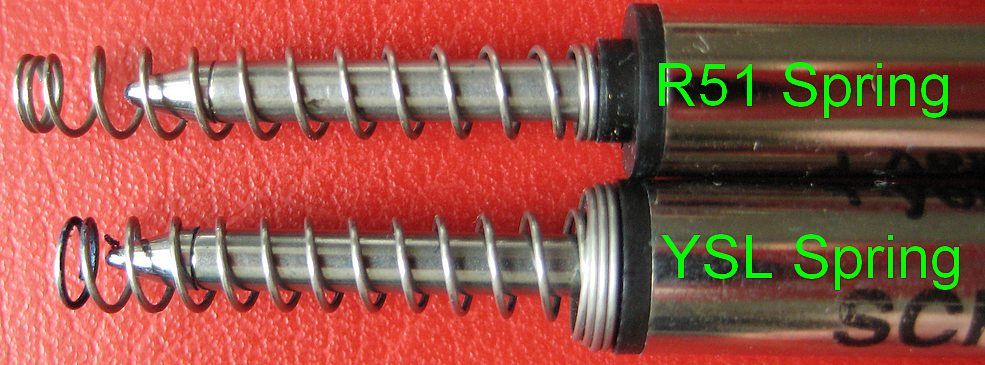
Retro51 spring, j'accuse!

I'm not sure where the blame lies for this. Perhaps the tolerance between the refill and the nosecone opening could be tighter. Perhaps it is left loose intentionally; I have read the Tornado can use Parker style refills too. I do suspect the Tornado's spring, which is a bit crudely made compared to my YSL rollerball's (also twist activated and taking the same short Schmidt refills). There's less effort made to make the end coils sit straight for example,and the YSL spring makes better use of the refill's collar. Depending on which way round I fit the spring, I can occasionally hear it squirm against the nosecone as the point is extended or contracted.

Personally speaking, these are very minor issues that don't add up to much disappointment, there is far too much the manufacturer got very right! I'm happy with the care evidenced in both the design and execution of the Bocote Tornado.


Functionality
I'm mostly a fountain pen guy, I know much less about rollerballs, gel pens, and such. I do understand that non-fountain pens write as well as their refill, so a few words on these.

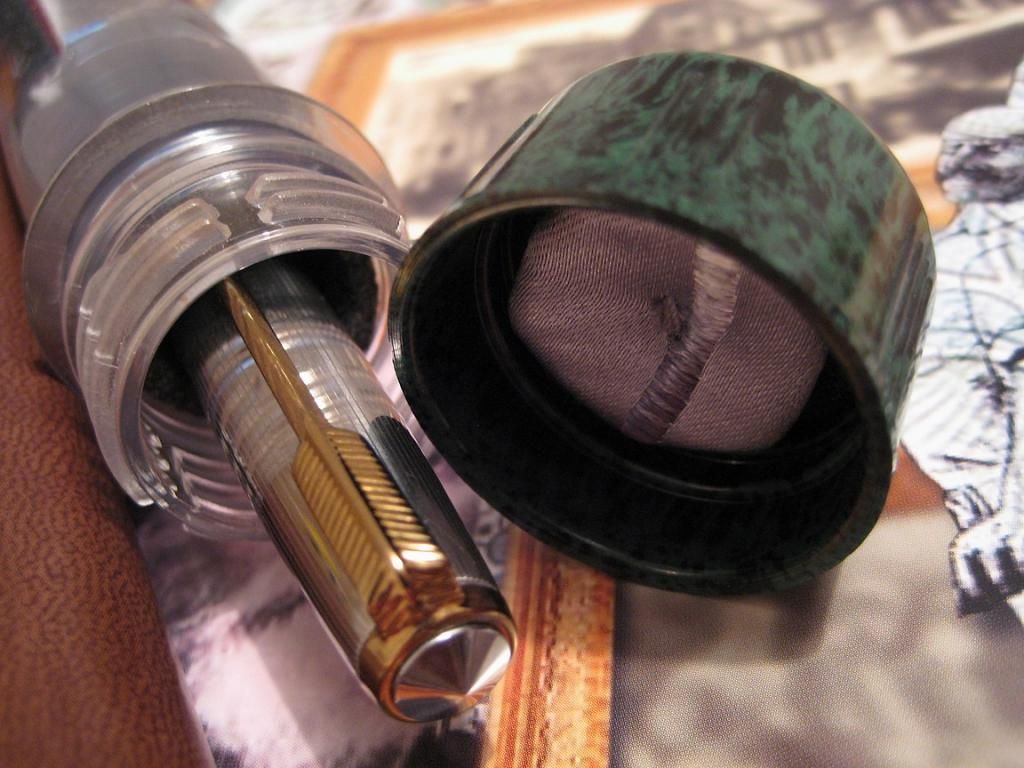
The Tornado uses rebranded Schmidt rollerball refills, which have long stuck in my mind as offering a near-fountain pen writing experience, being very smooth, with little drag, low viscosity, and allowing a shallower, fountain pen/pencilesque grip angle than a ballpoint will.

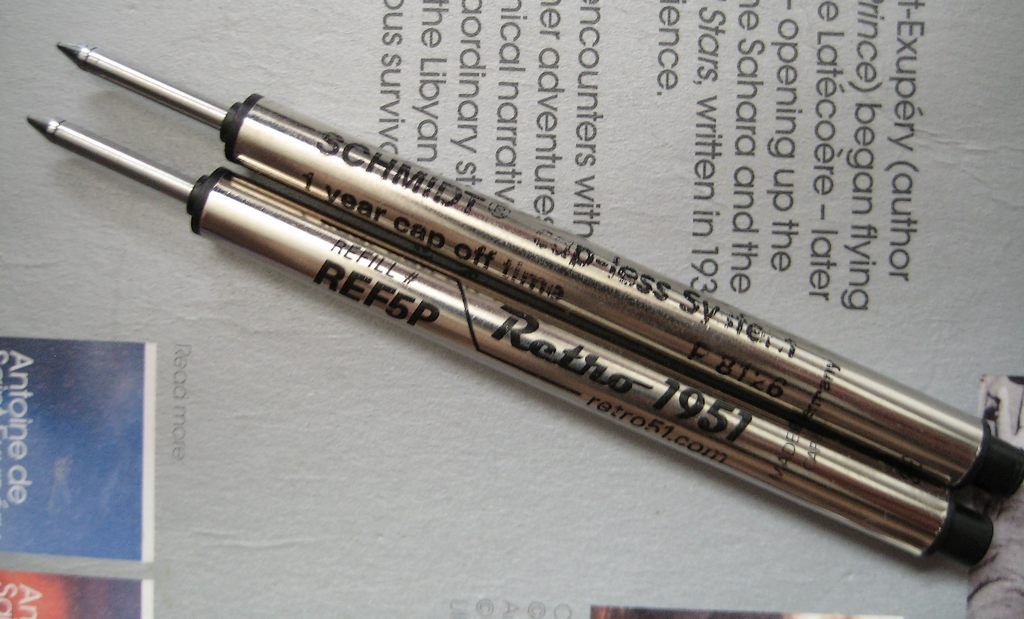
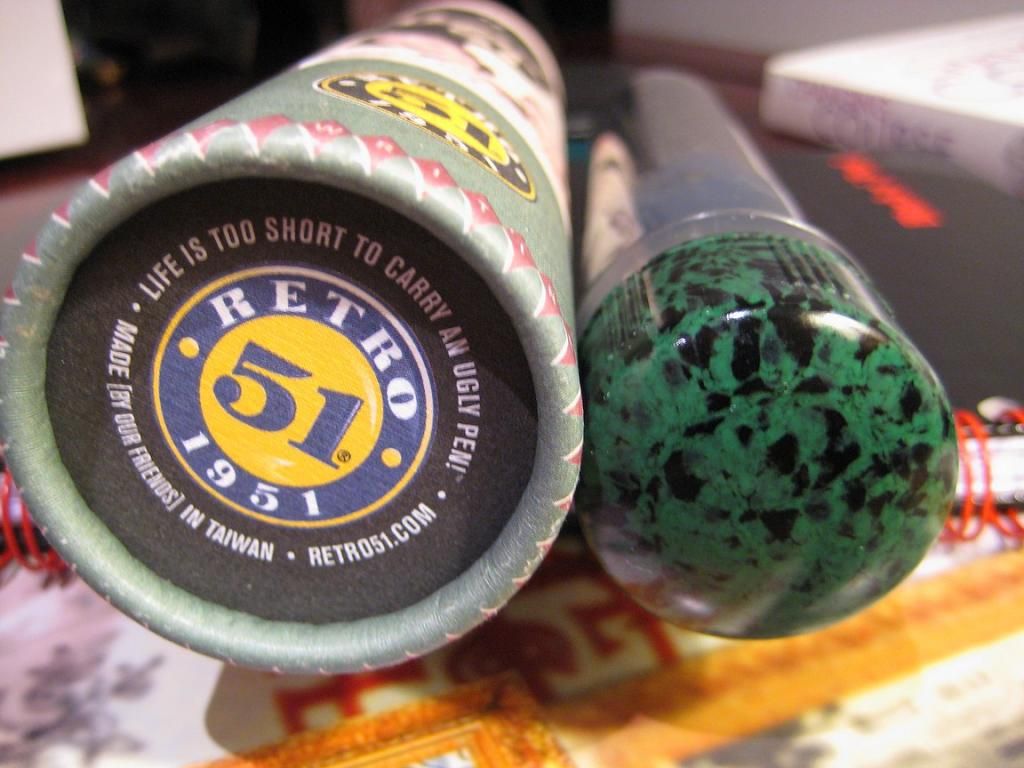
The pen body is made in Taiwan, and the refill in Germany.

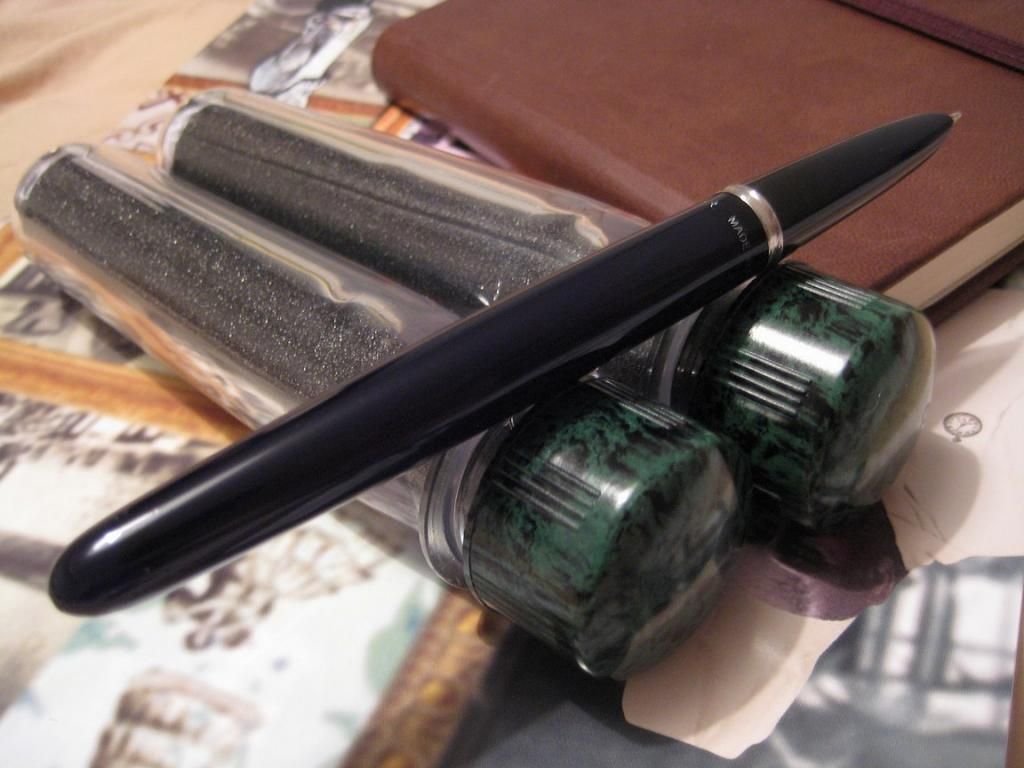
It's been a couple of years since I last used a Schmidt rollerball refill (the fine P8126, in a chrome Yves Saint Laurent pen). Writing with the Tornado's medium P8127 picked up where the P8126 left off; it really offers an outstandingly smooth and consistent writing experience. These are smashing refills; they starts first time every time, despite the unsealed retractable roller, and ink flow is generous, yet composed. While the low viscosity ink takes a few seconds to dry on the page, as a fountain pen user it's a familiar tradeoff I'm happy to accept.

Yes sir, a joy to use - for as long as they last! The sponge tube within is 5.5cm long. The liquid nature that makes the ink write so agreeably also makes for a fair amount of evaporative loss - note the "1 year cap off time" marking in the photo above. I've never found replacements on the high street, and in the past, actually ordered them in from overseas (they're worth the trouble). Of all the current online suppliers, Cult Pens deserves a mention, as a domestic UK supplier allowing you to buy them individually.


Leisurely notetaking with the hardwood Bocote Tornado in the great outdoors, its natural environment. Except I had to splice in some extra background noise I recorded, due to this clip's inexplicable silence. And I'm awkwardly failing to hold the notebook flat with one knee, as my other hand's holding the smartphone. It's all a sickening, cynical artifice.


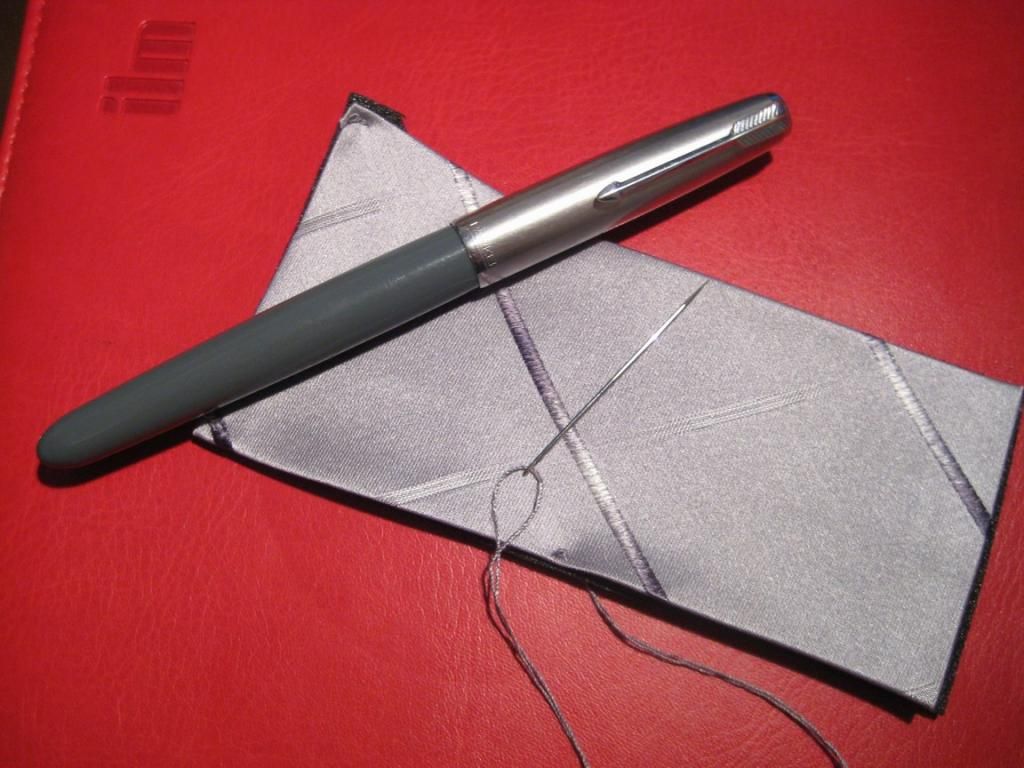
As a housing for the super Schmidt refill, I consider the wood-barreled Tornado better suited than the polished chrome YSL. The barrel taper is very shallow, and even at its end, the 0.9 cm section diameter allows a relaxed grip a habitual fountain pen user can appreciate. The Bocote hardwood is warm to the touch, pleasantly tactile, and lends the hand good control over the smooth rollerball tip.

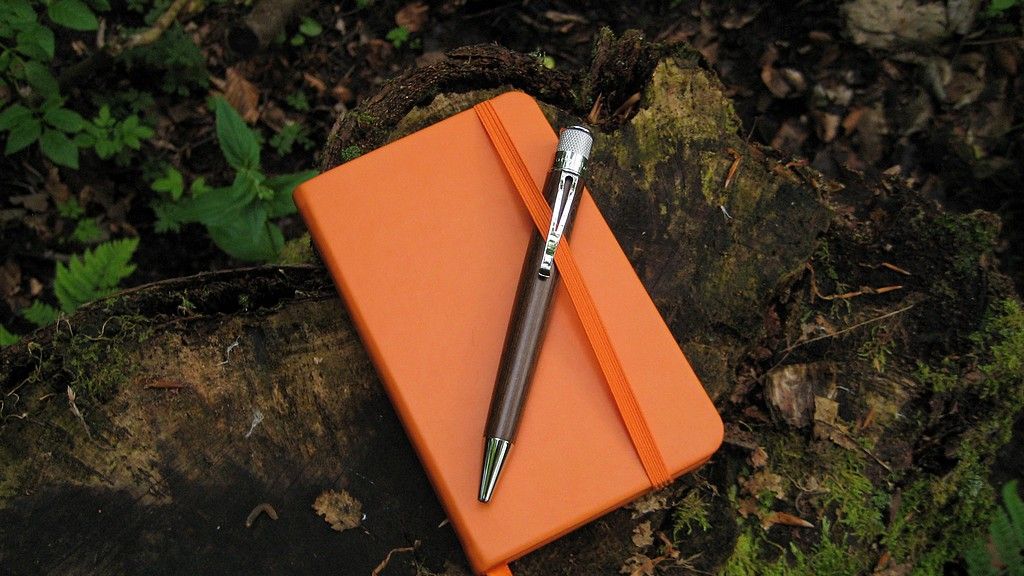
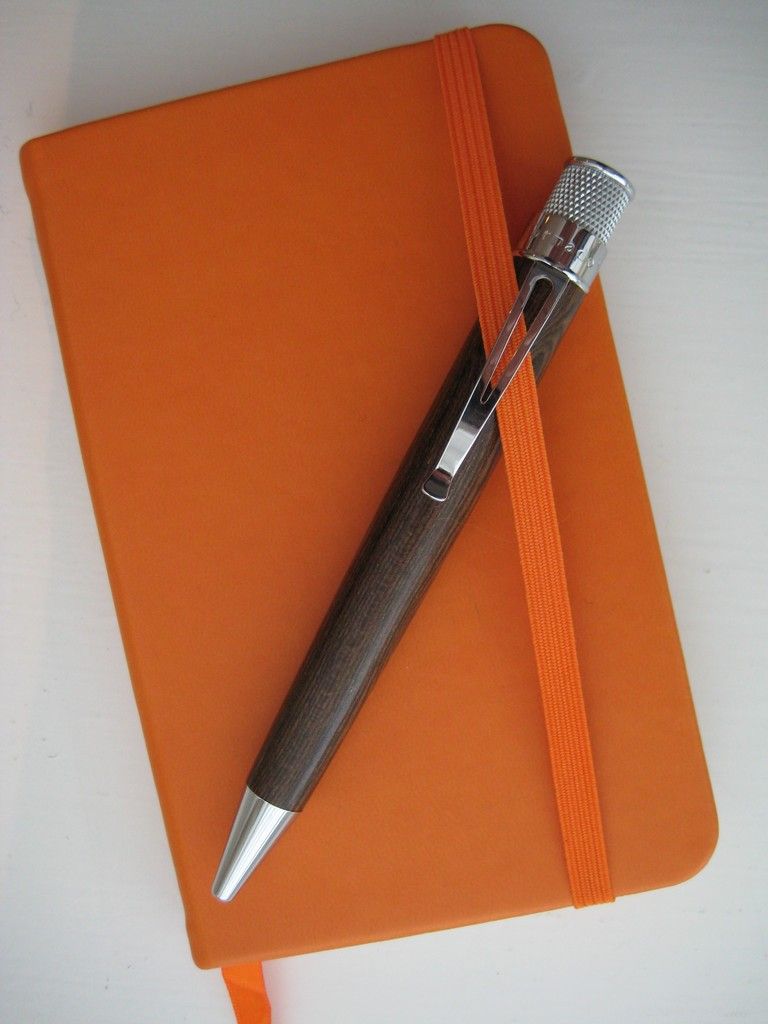
Although a full size pen, the Tornado is handy enough.
Here it is with an A6 notebook for context.

I'm a big fan of the clip. Its ski-jump shape is supremely functional, helping it fasten to pocket or page without snagging (well...most times), nor the need to prise it up. The end has a fairly wide footprint too.

Mentioned earlier, the twist action "knock" is deeply knurled for a good grip in use. Additionally, each nodule is a tiny flat topped pyramid rather than a spike, so they don't dig into your skin.

The clip does its job well enough.

I did a little asking around on the FPGeeks forum before purchase, and one of the opinions put forward was the Tornado can be a little back heavy. I'd agree - it hasn't been enough of a bother to irritate much while writing, but when typing, pen in hand ready to scribble down ideas or asides (my mind is all over the place like that), I do have to let the barrel rest on my thumb to stop it slipping. Better balanced pens like the Parker 51 will happily stay nestled in the purlicue as I bash away at the keys. There's no cap, which is convenient. Extending and retracting the point does require both hands, though.


Brand/Dealer Interaction
Buying this Tornado was my first interaction with Retro51, and with the Penshed, a UK dealer. I had some questions about the Bocote finish, as the results on Google Images were a bit render-y; I struggled to get a sense of what the pen looked like in real life. Both the manufacturer and Penshed were quick to respond with helpful advice. Their hands were tied by certain policy decisions, but with the photos and info they gave, I was able to make an informed purchase:
  • All Tornado rollerballs are now solely supplied with a black, medium refill. Even the Deluxe range. This is a bit of a shame, as I would have gone for a blue cartridge given the choice. 
  • The packages are sealed, so you won't actually see the pen you're buying till you've bought it, whether in store or online. This is obviously less of a nuisance with the laquered metal models, but if you're looking for the individuality of a hardwood Deluxe model, prepare to be strangers till you rip off the cellophane! Going by a photo Retro51 sent me, there's a 2 in 3 chance of receiving a dark Bocote. I liked those odds and am glad I took a chance.
Mine was a very specific circumstance, seeing as the majority of the Tornado range are made from very consistent materials, so I appreciated the creative help I was given to get around the problem. The packaging, in all other respects, is excellent, comprising of soft foam & hard cardboard to protect the pen in transit. It's also small enough to easily fit through a standard letterbox, and the presentation has a unique style.


Yay/Nay?

On balance, this one's a definite "Yay" !


Day 35: Hopelessly lost. I leave this review in the hope
that its discovery might shed light on my fate.


Till next time!


Flounder

Sunday 18 May 2014

Japanese Eyedropper Servicing, An Introductory Exploration

[By "Introductory", I mean servicing eyedroppers is entirely new to me. I'm not an authority on these pens posting some sort of freshman 101 class]

It's been a while since I turned my attention to this project; my apologies to those interested. In the last post, the threaded boss was removed from the barrel of a Japanese eyedropper fountain pen, with the ultimate goal of changing the seals. This raised more questions, as the seals appear to be enclosed within the threaded boss rather than held inside the barrel by it.

At the time, I suspected the textured areas at either end of the boss to somehow provide access - here's a recap of progress so far, uploaded on the 5th. I had to put this project to one side shortly after, till today.


To bring things up to date, a good peer through a loupe and some decent sunlight revealed some extra machining on the blind cap side of the boss; I think the area highlighted is a separate piece, removable from the rest of the boss. It's very hard to make out, but I think a rubber O ring is visible below the recess too.


I reckon this bung provides access to the seals.


So, how to remove it? Some sort of expanding collet? Access would be better without the shut-off shaft in the way, and happily it does look like the shaft can be unscrewed from the blind cap. The awful photo below is the best of a very bad bunch; hopefully you can just about see the shaft threads, which are smeared with some sort of adhesive.


The blind cap assembly, I've sharpened this photo to help the threads
stand out. Sorry about the white balance
and glare.


I think an overnight soak in glycerine is in order; after that, we'll see about heating and waggling with section pliers to free the shaft from the blind cap.

To be continued...

Saturday 3 May 2014

It Works! Casting A C Ring Tool For Obscure Fountain Pens.

As you may have read in the preceding posts, lately I've been exploring the idea of casting made to measure C ring tools for servicing obscure fountain pens. After a fortnight's cautious experimentation, I finally felt it was safe to try this out (on a 1930s Japanese eyedropper with ink shut off feature), so let's skip to the chase:


Ta-da! The BHR threaded boss safely removed from the pen's barrel.
The ink shut-off stopper looks to be well preserved.


It works! The cast metal epoxy putty C ring made disassembly a breeze - having a tool which matched the pen's threads so precisely was a great help; the pliers' clamping load was well spread, and only a slight, steady pressure was needed as I rotated the barrel.

What It Is

A disposable C ring intended to safely manipulate the threaded boss of the proprietary fillers in obscure fountain pens, for the duration of a single restoration.

What It Isnae

A substitute for inexpensive, quality tools made available by Dr. Oldfield of penpractise.com, among others, to open the bosses and fillers of more widespread, top flight vintage pen brands.

Casting the C Ring

To make sure the epoxy wouldn't bond to the boss whilst setting, the threads got a coat of red rubber grease, followed by a single wrap of teflon tape. RRG helps preserve and lubricate rubber; I used it just because it's rubber safe like silicone grease, easier to see, and easier to wash off after use.


Red rubber grease on the boss...

As well as acting as a secondary epoxy barrier, the RRG helped keep the teflon tape in place as it was wound around the boss. I only used a single wrap of tape round the boss' circumference, so that the epoxy could take as sharp an impression of the threads as safely possible.


...Followed by teflon tape (plumber's tape).

Winding an extra length of teflon round the entire barrel reduced the risk of getting extraneous bits of epoxy on the pen as I manipulated a blob round the boss' threads. Safety first!


A C ring tool after casting. This one got an exterior impression of the plier
teeth, as well as an interior impression of the boss threads.


The metal epoxy putty used was Evo-Stik Hard & Fast. You chop off a slice, mix the two colours together until uniform, and "within 2 minutes of mixing, apply to surface pressing firmly". I found that powderless disposable vinyl gloves worked best for this, one pair to mix the stuff, another to apply the epoxy to the threads. Latex gloves tended to stick to the putty during last week's tests. Leaving it longer than two minutes made it easier to form a C ring as the stuff became stiffer, and more difficult to get a good thread impression for the same reason. Stick to the 2 minute rule!

The photo above shows a C ring tool shortly after casting (the epoxy is fuilly cured after an hour). It took a good, clear impression of the threads, taking some of the teflon tape off as it was unscrewed from the boss. Cleanup was with a ph neutral, fragrance free soap and a soft child's toothbrush, brushing along the threads rather than across them.


Using the C ring to remove the threaded boss from the pen's barrel

Not knowing if the boss was left-loosey or not, I wanted to make sure resistance from other factors was kept to a minimum. This meant the usual dry heating, and also some glycerine tipped into the barrel, to hopefully act as a "rubber safe, better than nothing" penetrating fluid (the pen was orientated nib-up as removal was attempted).

Between the heat, C ring and glycerine, the pen-gods were appeased, the boss simply gliding out of the barrel on a standard lefty-loosy thread with the C ring lightly clamped around it, and smooth section pliers rotating the barrel in the heat stream of a hairdryer. After all that preparation, it took less than 5 minutes! Talk about an anti-climax!


The glycerine soaked boss, immediately after removal from the barrel.

As before, cleanup was with soapy water and a good rinse.

The boss, freed from the barrel. Remnants of the glycerine
are visible at the topmost threads.


Macro shots of the threads (click thumbs to zoom):


Boss Before Casting The C Ring

 photo BeforeCRingCasting1.jpg  photo BeforeCRingCasting2.jpg  photo BeforeCRingCasting3.jpg
 photo BeforeCRingCasting4.jpg

Boss After Casting the C Ring

 photo AfterCRingCasting1.jpg  photo AfterCRingCasting2.jpg  photo AfterCRingCasting3.jpg

 photo AfterCRingCasting4.jpg  photo AfterCRingCasting5.jpg


Boss After Clamping the C Ring & Removing the Boss


 photo AfterCringclamping001.jpg  photo AfterCringclamping002.jpg  photo AfterCringclamping003.jpg

 photo AfterCringclamping004.jpg  photo AfterCringclamping005.jpg


BOSS DRUM!


Afterthots

Of course, getting the boss out of the pen is only the beginning of this repair. I still have to get at whatever felt, cork or rubber sealing material is within, and replace it. We'll see! The two rough areas above and below the boss are the next areas of investigation. Hopefully one of them will provide access!